This project shouldn't be taken too seriously, it's more about a "proof of concept" or, to put it another way, you want to see if you can do it.
However, there are certainly a few hobbyists among you who also have so much fun with something like this!
The idea was to somehow make something useful out of the old rod antennas that came with my ImmersionRC set. At first I wanted to expand the "angle" but then I saw the inside of the antenna (would have thought it was more spectacular) and had to think of a thread in RCGroups.
http://www.rcgroups....d.php?t=1292451
IBCrazy will say something to one or the other, he was more or less the one who brought the Cloverleaf antennas to the FPV folks . What I did was change the values to 5.8 Ghz to convert: 
5.8 GHz => Lambda = 51.75 mm
According to his picture: Then I get these dimensions: H = approx. 2-3 mm Lambda/2 = 25.88 2xLambda/3 = 34.5 3xLambda/4 = 38.81 So let's go with the 5.8Ghz rod antenna (from IRC):
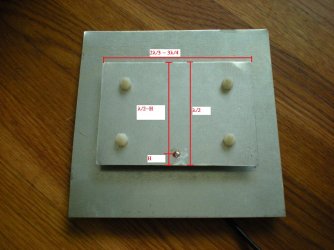
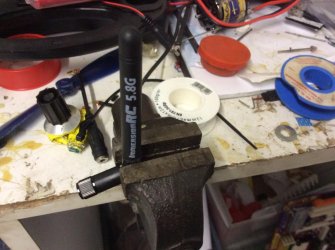
"Saw" the rod antenna all around and then break through the rest with a little care, so you don't accidentally damage the insulation of the cable:
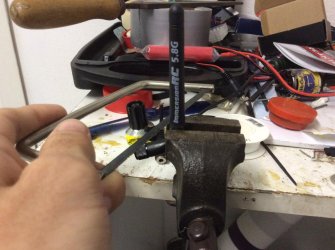
Then "cancel" with feeling:
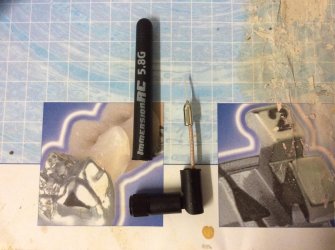
Carefully trim the cap with side cutters:
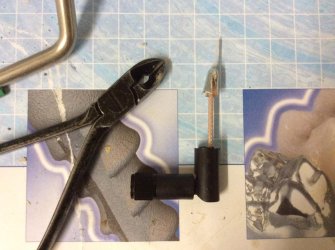
I happened to have a mirror mounting plate lying around from IKEA or Bauhaus, so there was still some glue on one side, but it's only important that it's conductive metal and that's the case here, what more could you want
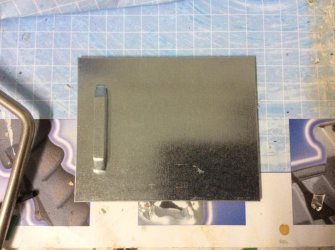
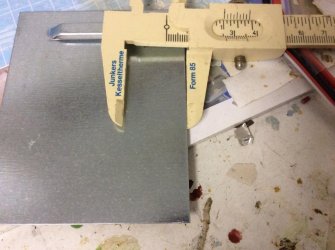
Then transfer the dimensions, here it is important that you try to "make an effort" 
Now a cutting disc would have been better, but there was none left, so the hacksaw has to do the job:
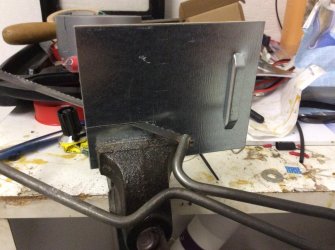
This is how the piece for the "receiver" looks like:
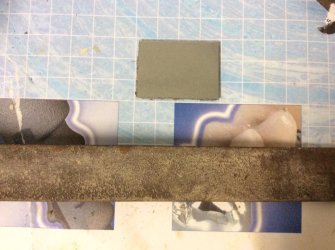
The "reflector" has to be a bit bigger, for me it's about 5mm bigger all around (varies from 3-6mm), as far as I could interpret it seems to be of secondary importance.
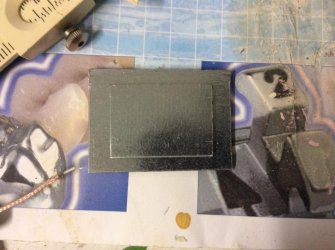
The "H", i.e. the distance between the two plates (and the "hole to the bottom edge) should be 2-3mm... and coincidentally these polishing discs are 3mm thick:
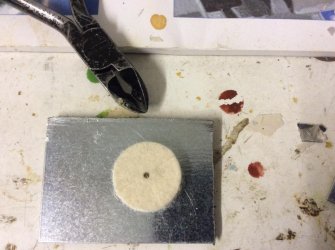
So I quartered these like a pizza, one slice for each corner:
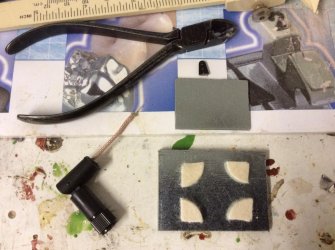
Drill the hole, as described above, with a distance of 3mm (2-3mm) to the lower edge (and transfer to the reflector and drill there as well:
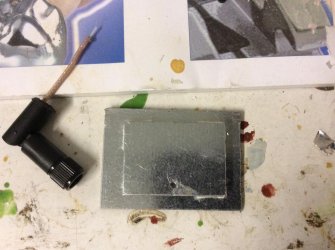
Unfortunately I only have an unusable picture of the soldering, it is important that you solder "the ground" to the reflector and to the actual "antenna", i.e. the "upper plate", the antenna  . Then it looks like this:
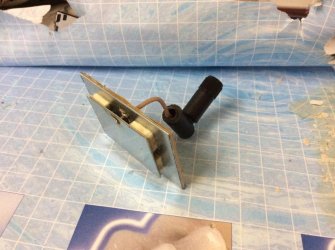
And again from a slightly different angle:
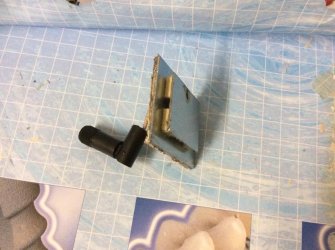
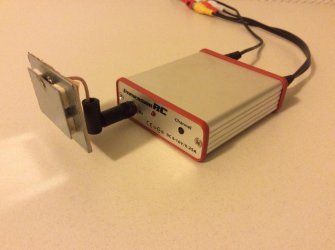
Mounted on the receiver (ImmersionRC Uno):
I've also tested the antenna a bit, but only in the house, put a few walls between me and my quad to compare rod, cloverleaf and patch.
The Stab seems to me to be the worst option (no wonder?  ), the Cloverleaf performs only marginally worse than the Patch, but the penetrability doesn't say that much about the range.
But what was noticeable: The rod antenna relies on both antennas being "aligned" in the same way, Cloverleaf and Patch were not really sensitive to that. However, the patch comes with the fact that it is a directional antenna, i.e. "in front of it" it listens better than around it, which has the advantage that if you have a lot of interference "behind you" that is hidden with the patch, however, you cannot fly very far behind you because of this. Depending on how conscientiously it is built, you should be able to achieve a higher range with it in the area in front of it, e.g. with the Cloverleaf.
The next time I'm "outside" again, I'll also test the range with the patch and add it here!
So, the next little tutorial is finished, I hope I could infect you with my "handicraft fever", as always, don't hesitate to ask questions, I always try to answer as quickly as possible 
However, there are certainly a few hobbyists among you who also have so much fun with something like this!
The idea was to somehow make something useful out of the old rod antennas that came with my ImmersionRC set. At first I wanted to expand the "angle" but then I saw the inside of the antenna (would have thought it was more spectacular) and had to think of a thread in RCGroups.
http://www.rcgroups....d.php?t=1292451
IBCrazy will say something to one or the other, he was more or less the one who brought the Cloverleaf antennas to the FPV folks . What I did was change the values to 5.8 Ghz to convert:
5.8 GHz => Lambda = 51.75 mm
According to his picture: Then I get these dimensions: H = approx. 2-3 mm Lambda/2 = 25.88 2xLambda/3 = 34.5 3xLambda/4 = 38.81 So let's go with the 5.8Ghz rod antenna (from IRC):


"Saw" the rod antenna all around and then break through the rest with a little care, so you don't accidentally damage the insulation of the cable:

Then "cancel" with feeling:

Carefully trim the cap with side cutters:

I happened to have a mirror mounting plate lying around from IKEA or Bauhaus, so there was still some glue on one side, but it's only important that it's conductive metal and that's the case here, what more could you want

Then transfer the dimensions, here it is important that you try to "make an effort"

Now a cutting disc would have been better, but there was none left, so the hacksaw has to do the job:

This is how the piece for the "receiver" looks like:

The "reflector" has to be a bit bigger, for me it's about 5mm bigger all around (varies from 3-6mm), as far as I could interpret it seems to be of secondary importance.

The "H", i.e. the distance between the two plates (and the "hole to the bottom edge) should be 2-3mm... and coincidentally these polishing discs are 3mm thick:

So I quartered these like a pizza, one slice for each corner:

Drill the hole, as described above, with a distance of 3mm (2-3mm) to the lower edge (and transfer to the reflector and drill there as well:

Unfortunately I only have an unusable picture of the soldering, it is important that you solder "the ground" to the reflector and to the actual "antenna", i.e. the "upper plate", the antenna

And again from a slightly different angle:

Mounted on the receiver (ImmersionRC Uno):

I've also tested the antenna a bit, but only in the house, put a few walls between me and my quad to compare rod, cloverleaf and patch.
The Stab seems to me to be the worst option (no wonder?
But what was noticeable: The rod antenna relies on both antennas being "aligned" in the same way, Cloverleaf and Patch were not really sensitive to that. However, the patch comes with the fact that it is a directional antenna, i.e. "in front of it" it listens better than around it, which has the advantage that if you have a lot of interference "behind you" that is hidden with the patch, however, you cannot fly very far behind you because of this. Depending on how conscientiously it is built, you should be able to achieve a higher range with it in the area in front of it, e.g. with the Cloverleaf.
The next time I'm "outside" again, I'll also test the range with the patch and add it here!
So, the next little tutorial is finished, I hope I could infect you with my "handicraft fever", as always, don't hesitate to ask questions, I always try to answer as quickly as possible


